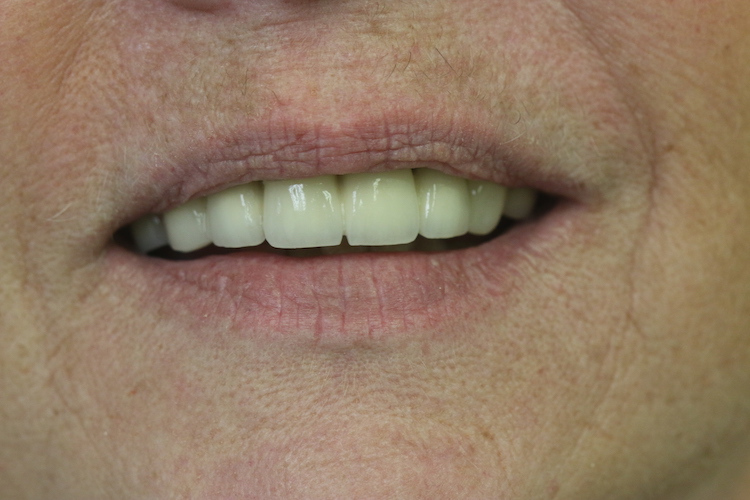
Grandpa, What's With Your Teeth!
Step 1
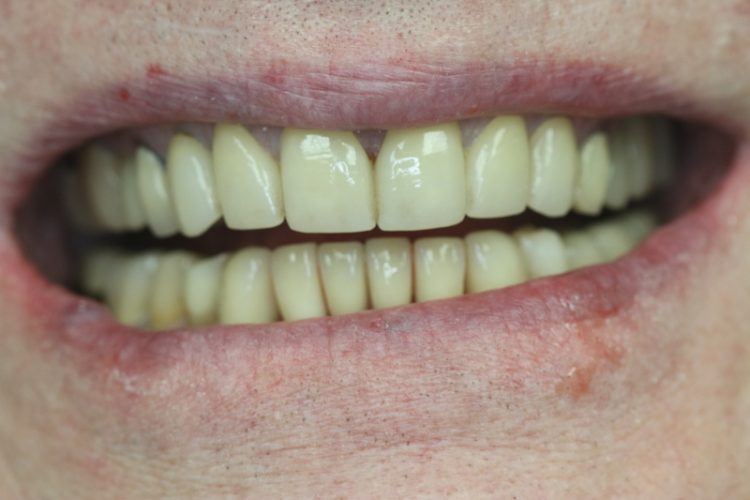
The image to the right was taken of an 84 year old male patient in 2020, whose grandson offered to him one day, "Grandpa, your teeth are funny looking!" Embarrassed, the man decided to see his dentist about how to correct the problems with his teeth.
After examining the man's teeth and reviewing them radiographically, impressions were taken and models were retrieved from the impressions, which were replicas of his dentition.
Step 2
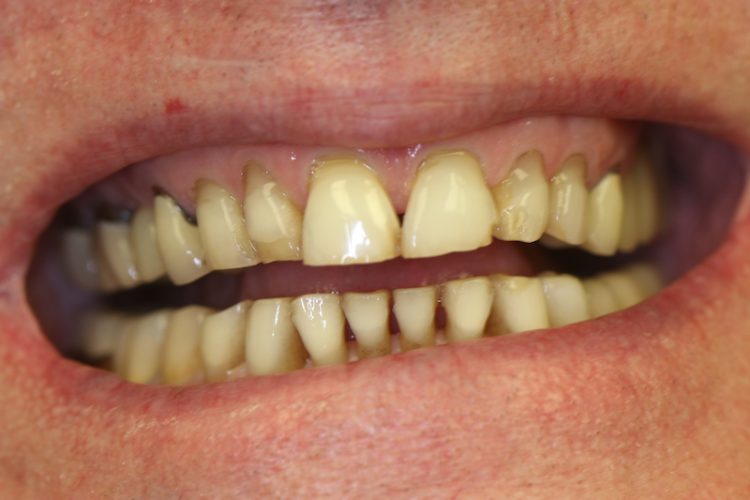
These models were sent to the laboratory where the models were "modified" using CAD-CAM (Computer Aided Design and Computer Aided Manufacture) to digitally remedy the problems and wax up replicas of what the teeth would look like after the corrections were made.
To the right is an image of the waxed up version of what the upper teeth could look like.
The altered model was shown to the patient; he liked the modified version very much and wanted to proceed.
Step 3
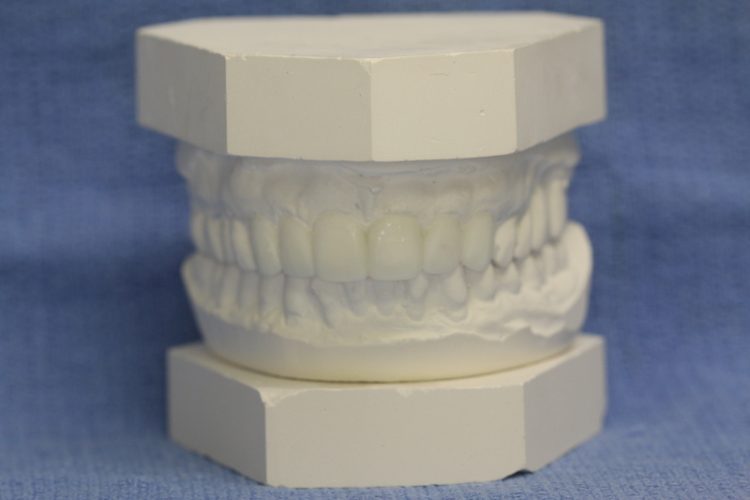
The teeth were prepared for Porcelain Jacket Crowns. Temporary crowns were fabricated and an impression was subsequently taken as well as other additional records.
The new Porcelain Jackets were fabricated in the laboratory. The new Porcelain Jacket Crowns were tried in and with the patient's approval they were cemented in place.
To the right is an image of the new Porcelain Jackets Crowns cemented in place.
Step 4
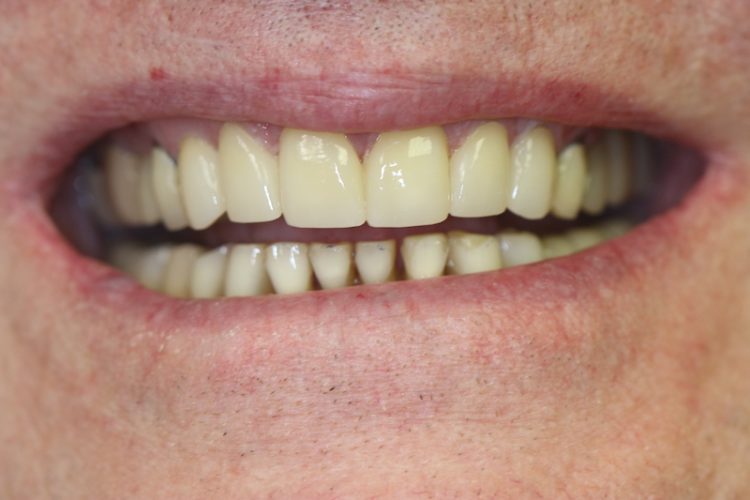
After the Porcelain Jacket Crowns were inserted the patient was unable to complete the planned dental care for the lower anterior, due to the Pandemic.
However, with the recent decrease in the number of COVID-19 cases the patient decided to complete the lower anterior.
The image to the right is the completed case (2022).
A Research Astrophysicist Wanting A Star Shine In His Smile
Step 1
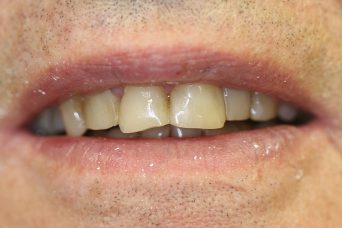
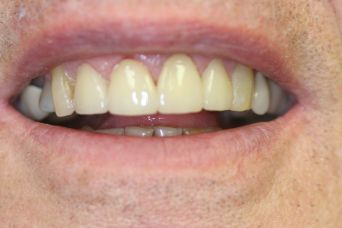
A 75 year old male former Research Astrophysicist, is a patient in our office. Most recently he asked about addressing his front teeth, They were worn and chipped. The slide is an image of his teeth prior to treatment.
Step 2
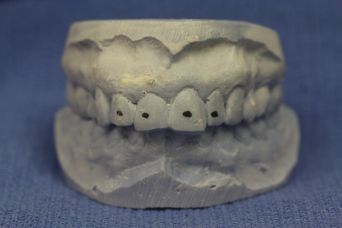
Impressions were taken and models were retrieved from the impressions. The models shown in this slide were sent to the laboratory.
Step 3
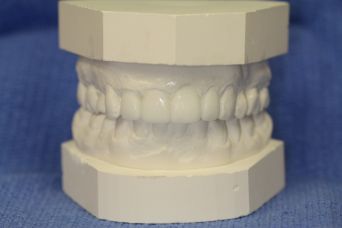
The models were duplicated and then altered using computers to design a new look to his front teeth. The current slide is an image of the new concept teeth.
Step 4
He liked what he saw and decided to approve the proposed care. He made an appointment, The teeth were prepared conservatively. Impressions and records were made. He was given temporary restorations to wear in the time interim during which the laboratory fabricated the conceptualized veneers. This slide is an image of the final restorations.
A Work from Home Pharmacist/Mom Wanted the Rx for a New Smile
Step 1
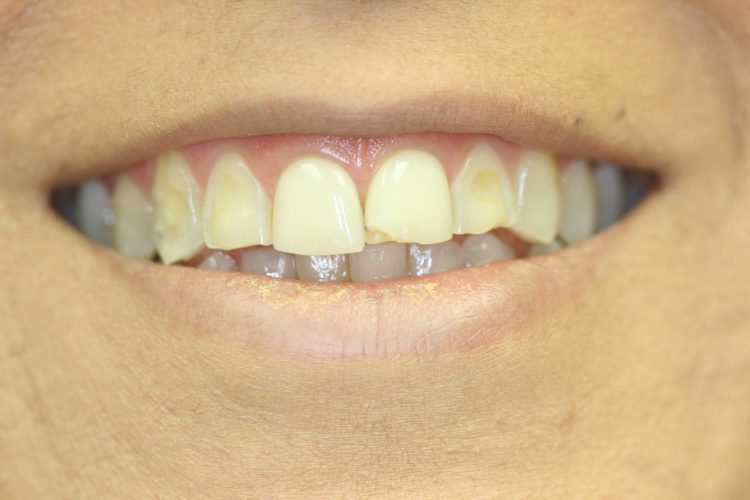
Recently, a 42 year old female presented to our office, with a desire to improve her smile. She had veneers previously, but they were now old and worn. She was apprehensive about dental care. She stated her teeth were sensitive. Her initial presentation is shown on this slide.
Step 2
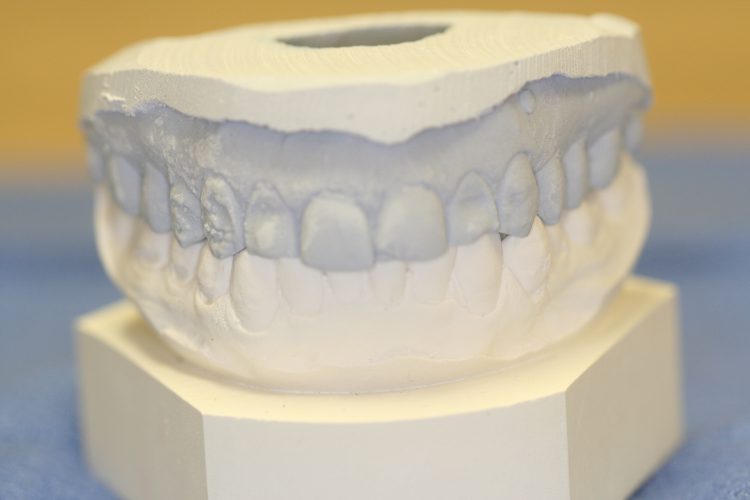
Our prescription for success includes waxing a simulation of the final case so that the patient can evaluate what the finished case will look like before the dental care is undertaken. The pre-treatment version appears on this slide and the waxed computer simulation version is on the next slide.
Step 3
After further discussion and evaluation with the patient it was learned that she wanted to lighten the color of her teeth. So before beginning the cosmetic care the patient bleached her teeth at home with a very mild bleaching agent.
Step 4
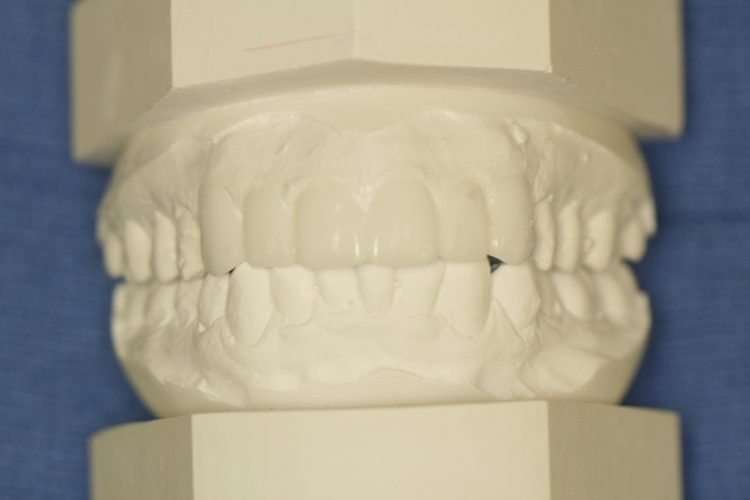
After 2 weeks of bleaching her teeth at home, the teeth were then prepared for Porcelain Veneers. An impression was recorded and shading values were taken. Temporary veneers were then fabricated. The laboratory then proceeded with the fabrication of the Porcelain Veneers. The completed case is shown on this slide.
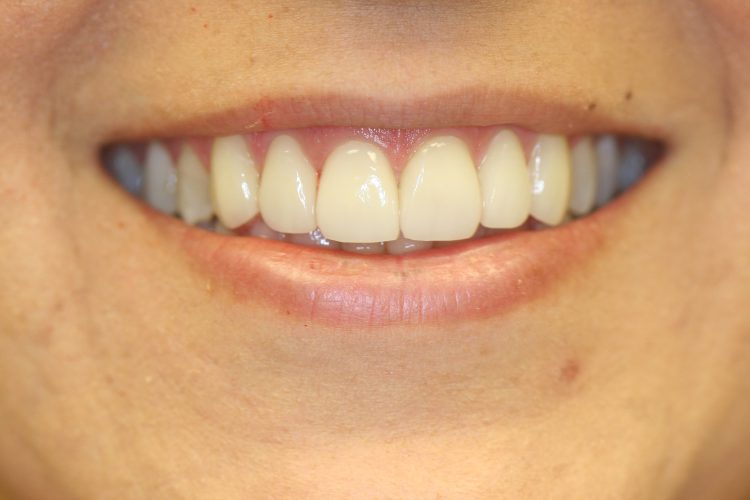
A 40 Something Mom Wanting to Improve Her Smile
Step 1
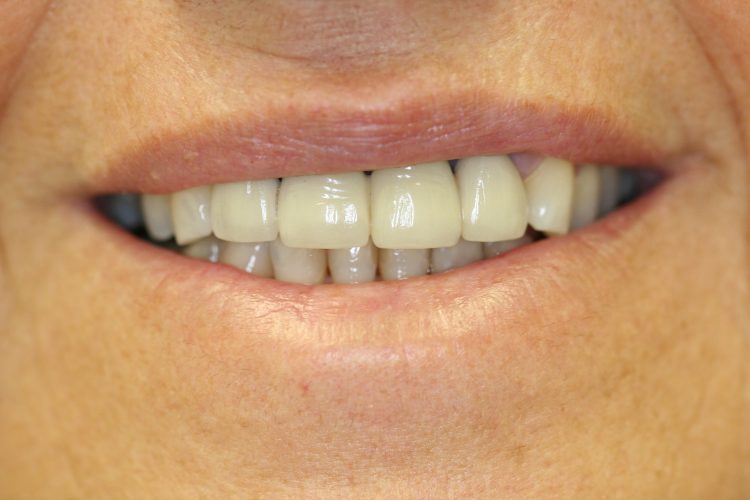
This is Elena who was unhappy with her upper anterior teeth because they were restored as a fixed bridge by another dentist. The bridge teeth were dark in color. A treatment plan was formulated that included the placement of implant fixtures eliminating the need for a bridge.
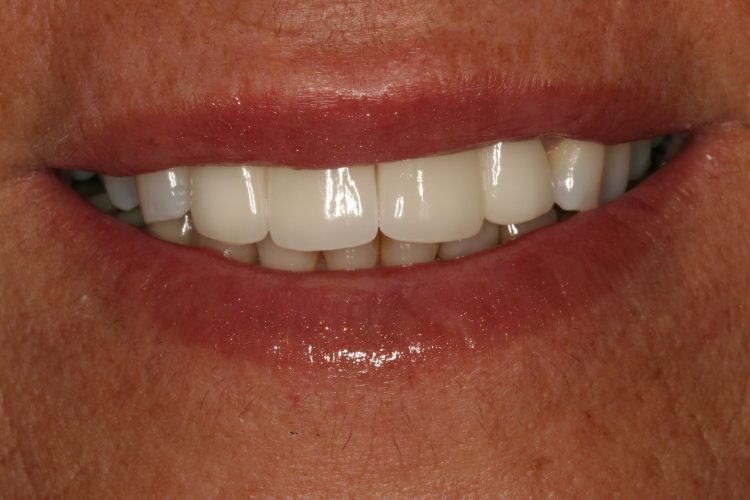
Step 2
This image shows the completed case with the implant fixtures in place and new individual crowns. Note the lighter color of the teeth in the “aesthetic zone”, which gave Elena an improved smile.
A Bank Financial Planner With Plans for New Front Teeth
Step 1
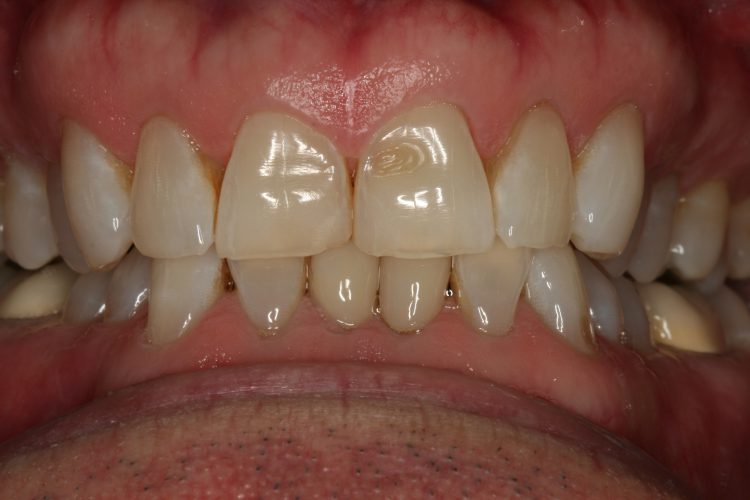
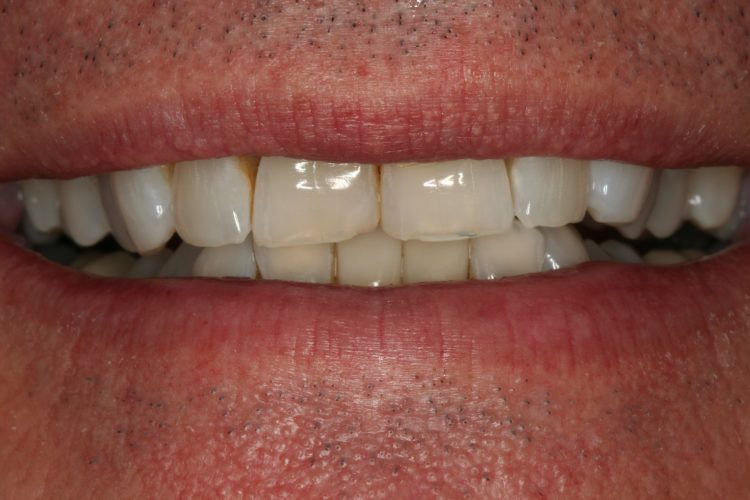
This is Christopher, a 50 year old financial planner who was unhappy with his upper front teeth. An impression was taken and a model was retrieved which was sent to a laboratory. At the laboratory, the model was waxed by using CAD/CAM.
Step 2
The altered model was returned to our office and shown to the patient. He approved of what he saw. The teeth were prepared for porcelain veneers. An impression was taken of the prepared teeth and sent to the laboratory for fabrication.
Step 3
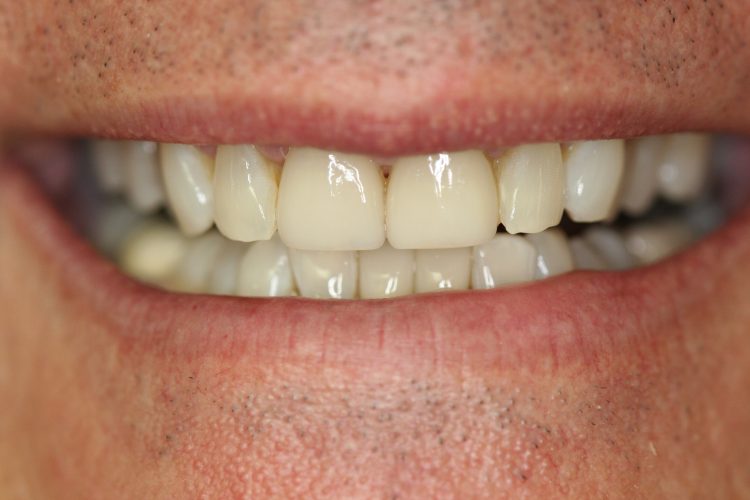
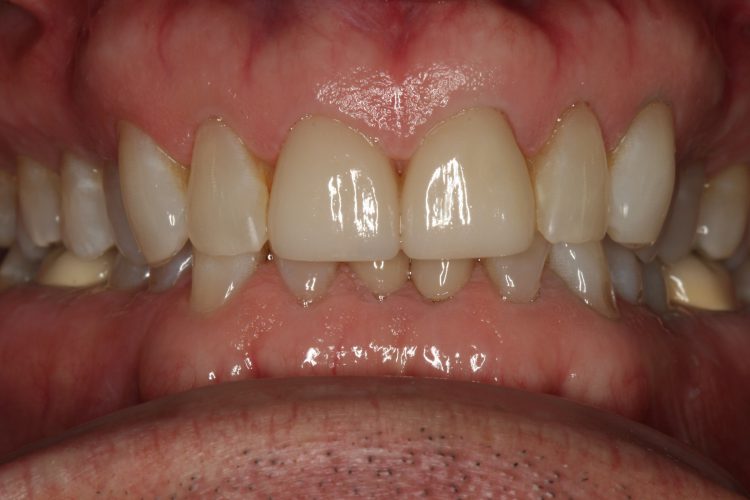
The current slide and the following slide are images of the completed treatment of the bonded porcelain veneers in place.
Step 4
If you have any questions regarding this case or any other case in our smile gallery, please contact us at (561)-734-8600.
A 70 Year Old Retiree Wanting To Take A Few Years Of Wear Off His Smile
Step 1
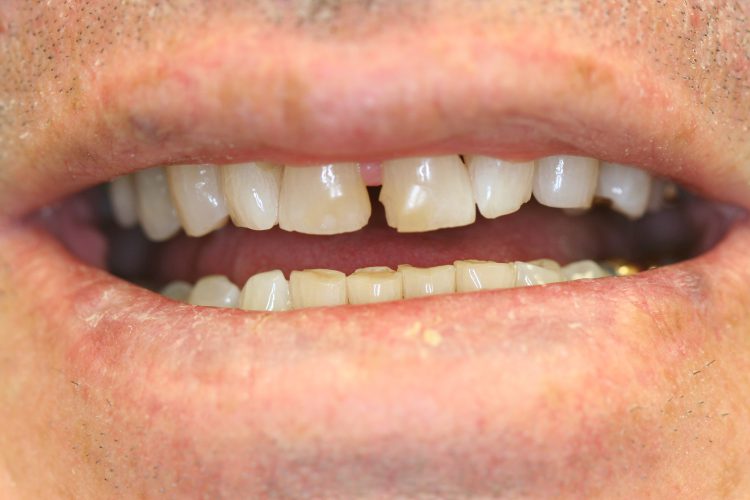
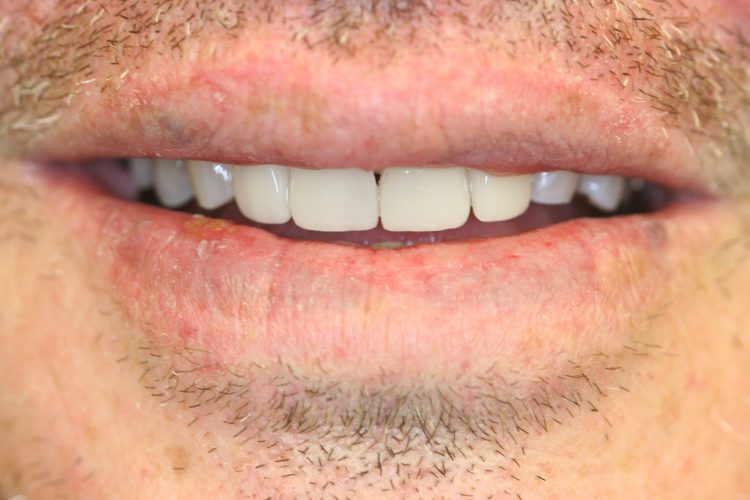
A seventy year old presented to our office with a desire to improve the aesthetics of his upper front teeth. The current slide represents the teeth prior to care.
Step 2
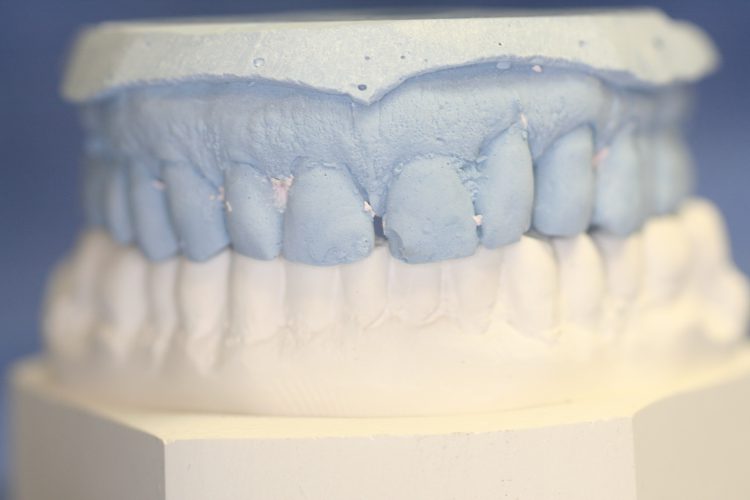
An impression is taken of the patient’s teeth. A model is retrieved from the impression. The current slide is a picture of the model of the teeth prior to care.
Step 3
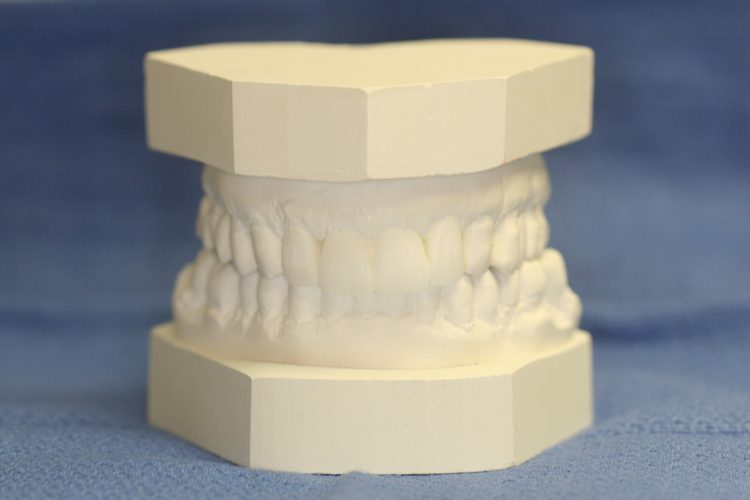
The model is sent to the laboratory. And with the use of CAD/CAM the model is waxed up by computer. This image represents an idealized mock up version of what is possible. This model was shown to the patient who liked what he saw and decided to proceed. The teeth were prepared for Porcelain Veneers and temporized.
Step 4
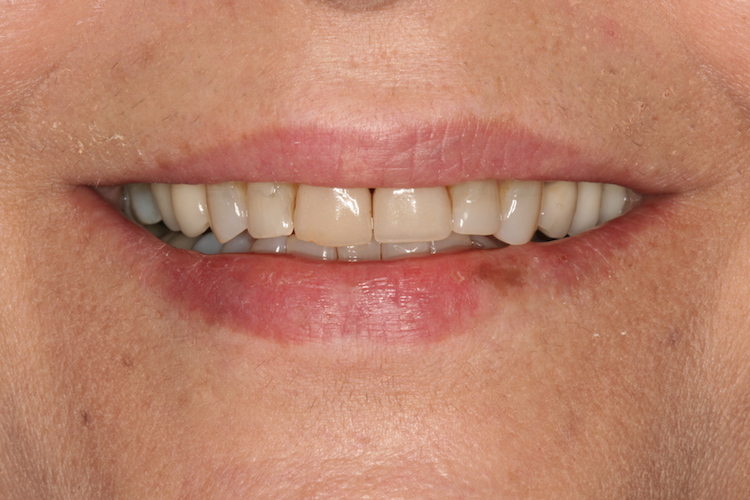
This image represents the case at completion with the new Porcelain Veneers bonded in place. If you would like to discuss this or any other case in the Smile Gallery, feel free to contact us at (561)-734-8600.
A Nurse Anesthetist That Wanted to Revive Her Smile
Step 1
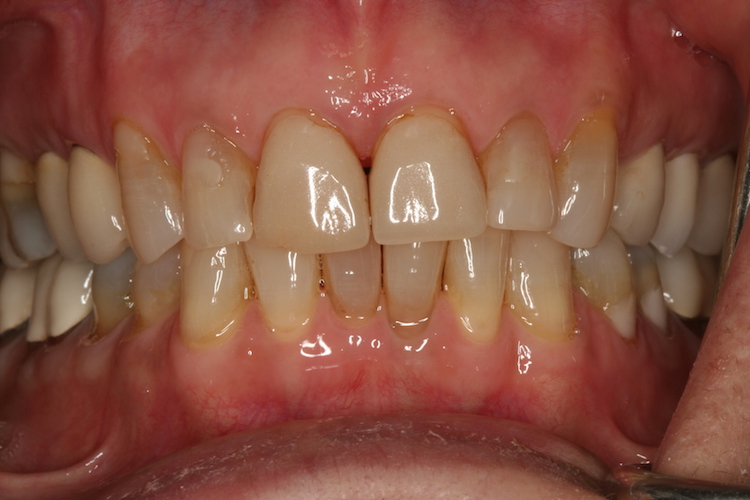
A 62 year old female patient presented to our office questioning if there is some dental procedure that could give her a new "dental" look. Prior to this time the patient only underwent routine dental care in our office. Her time schedule was limited; she was employed at one of the local hospitals as a Nurse Anesthetist. The image to the right and the image in step 2 are pictures of her dentition prior to dental care.
Step 2
Impressions of her dentition were taken in our office from which models were retrieved. The models were sent to the laboratory and through the aid of Computer Aided Design and Computer Aided Manufacture (CAD CAM) the models were waxed up to show what was achievable.
The patient was shown the modified models showing what the final case would look like. She liked what she saw and a date was set to get started.
Step 3
The teeth were prepared for Veneers. Impressions were taken, shades were selected and temporary dental restorations were fabricated.
The impressions and the mock up model was sent to the laboratory. The veneers were fabricated.
Step 4
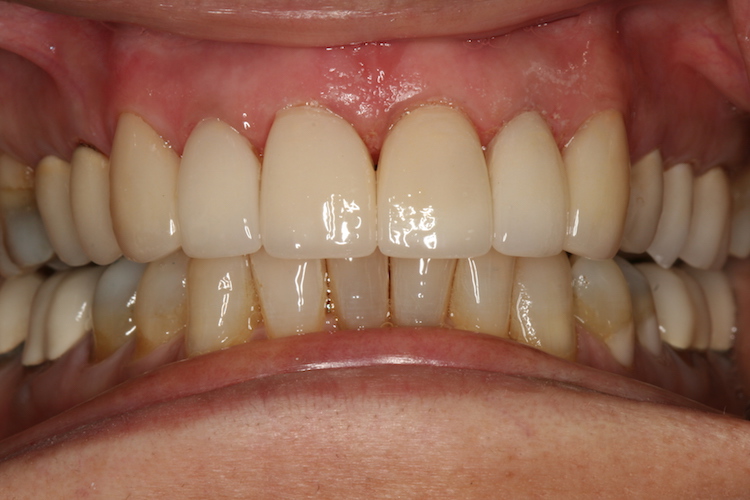
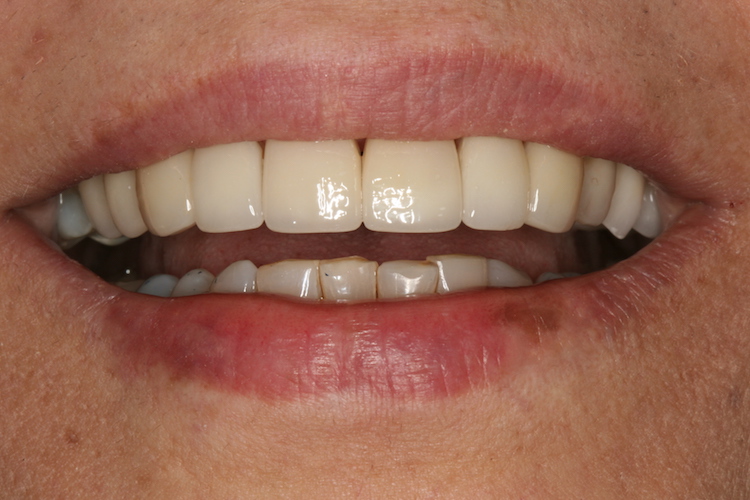
The patient returned and the temporary restorations were removed and the veneers were tried in. The patient liked them and they were bonded into place. The prior image in step 3 and the image to the right are of the final case.
If you would like to discuss this case or any other please feel free to call us at East Boynton Dental office of Mitchell Indictor DDS PA at (561)-734-8600.
Patient With Worn Teeth Requesting Guidance
Step 1
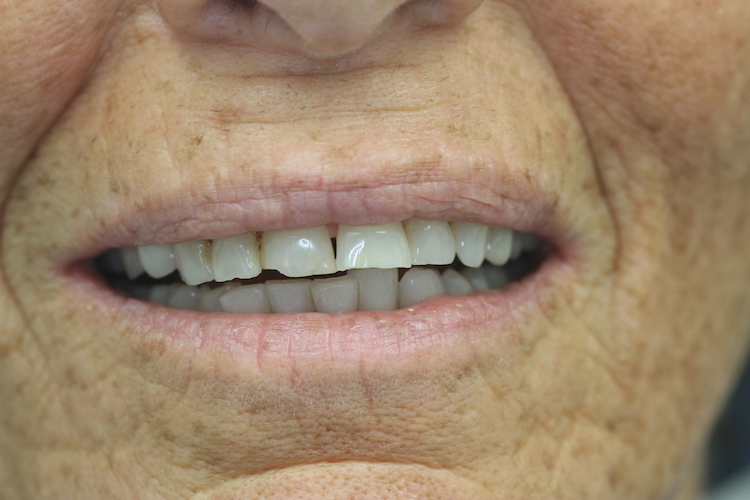
A patient recently presented to our office with anterior teeth that were worn in appearance and in need of some attention. An image of their teeth is shown to the left.
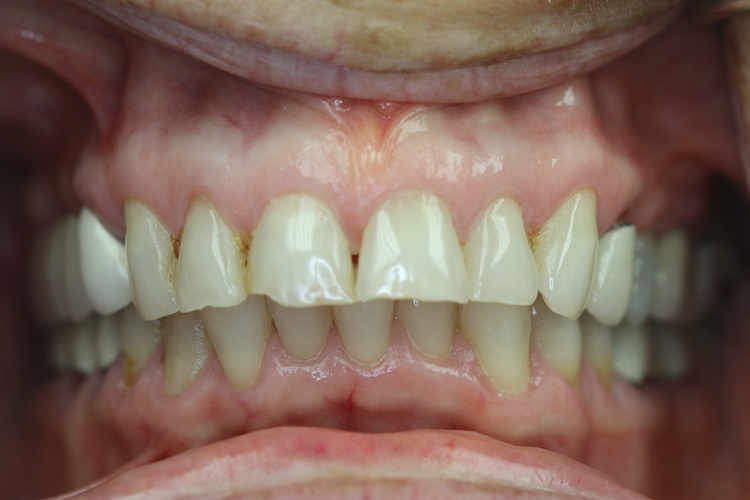
Step 1 (continued)
Another image of their teeth shown prior to treatment
Step 2
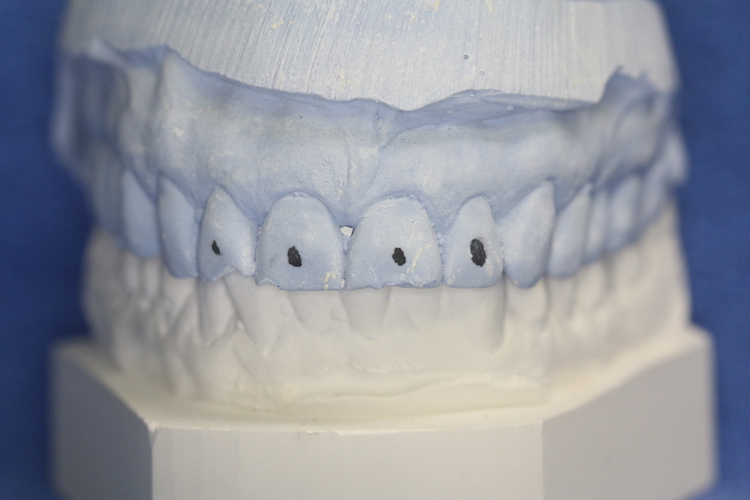
Preliminary impressions were taken of both the upper and lower arches of teeth. An image of the models is found on the left.
Step 3
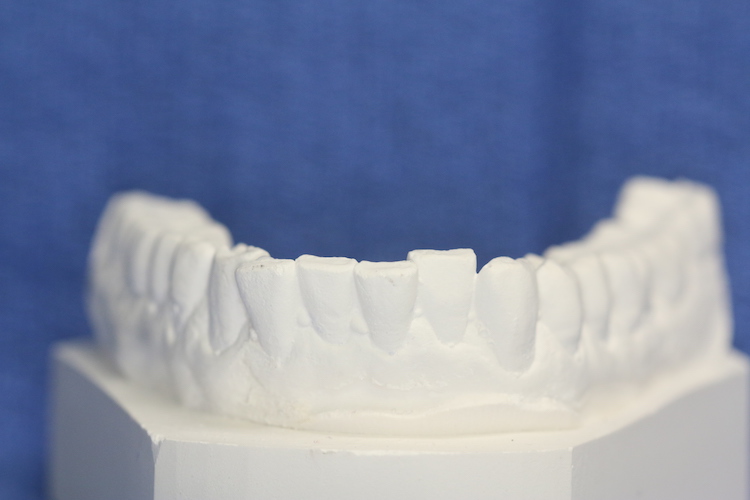
It also became apparent that the lower teeth would require some attention as well. One of the teeth in the lower anterior was above the plane of occlusion. An image of the lower teeth is found on the left.
Step 4
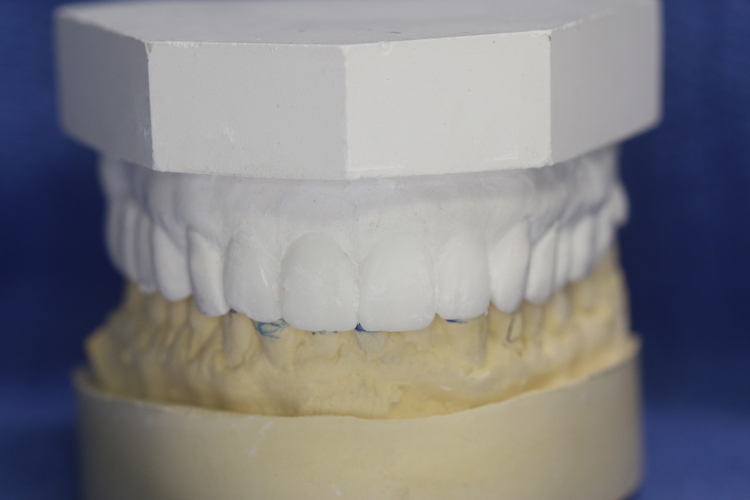
The models were then sent to the laboratory. There with the aid of Computer Aided Design and Computer Aided Manufacture, the upper model was waxed up to an ideal form. Originally it was felt that only the upper 4 anterior incisor teeth were in need of esthetic enhancement. An image of the waxed up Ideal version is found on the left.
The patient reviewed the waxed up model, liked what they saw and wanted to begin treatment immediately. Unfortunately they developed a metabolic disorder so plans were put on hold. That was about 1 1/2 years ago and before the Pandemic.
However, the patient's health improved and became manageable. They received COVID-19 vaccinations and Boosters and they were also given the "greenlight" from their physician to begin treatment.
Step 5
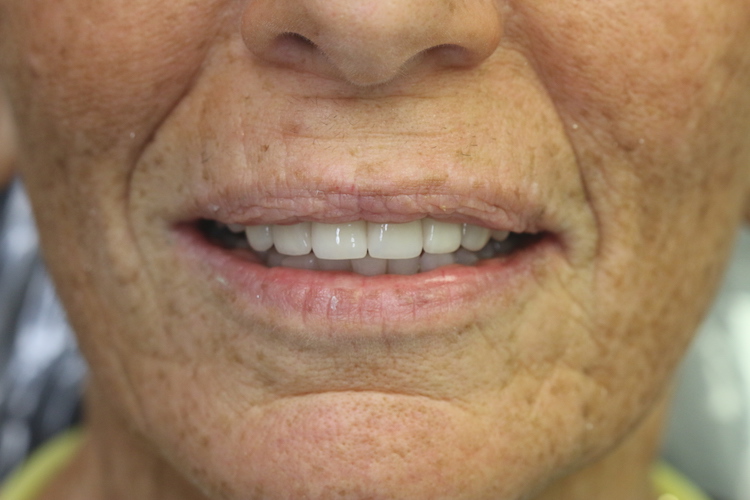
The teeth were prepared for Porcelain Jacket Crowns and individual Temporary Crowns were fabricated, however, the plan changed to include the Canine Teeth as well. A master final impression was taken of the prepared teeth. An occlusal bite registration was taken along with a horizontal record. All was sent to the laboratory where using the size and shape specification obtained from the waxed up version, the permanent Porcelain Jacket Crowns were fabricated.
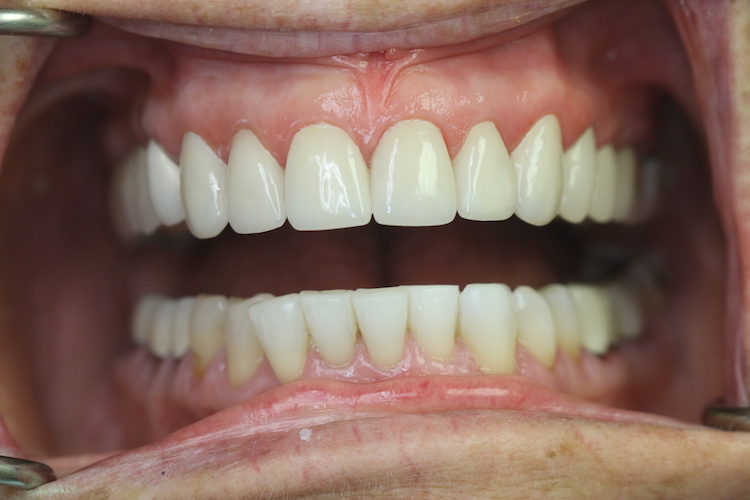
When the patient returned to the office, the temporary crowns were removed and the permanent Porcelain Jacket Crowns were tried in and with the patient's approval the Jacket Crowns were cemented into place. After completion we also fabricated a Clear Acrylic Occlusal Bite Guard.
An image of the completed case is found on the left.
Step 5 (continued)
Another image of the completed case is found on the left.
If you would like to discuss this case or any other in the Smile Gallery please feel free to contact us at eastboyntondental.com or you can reach us at (561)734-8600.
Executive Assistant Who Made an Executive Dental Decision
Step 1
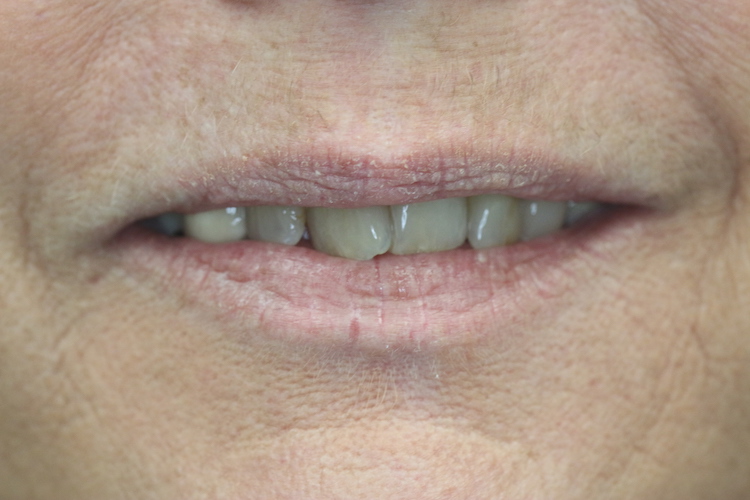
Accompanying is a case that was recently completed. No implants or veneers; just Prosthetic Care. A combination of fixed and removable prosthetics. An image of the patient's clinical presentation prior to beginning care is found on the right.
Step 2
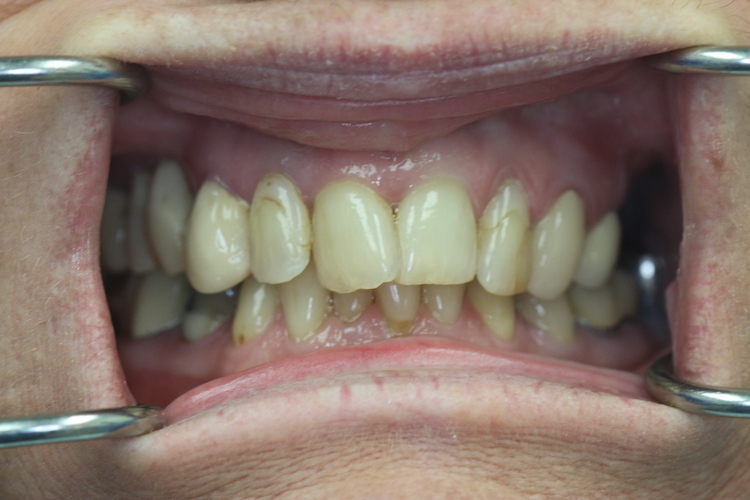
A female patient who has been a patient of our office for some time, wanted to restore her teeth. She had a single first molar tooth in the upper right posterior that was the posterior support of a fixed bridge that spanned to the canine. However, the first molar tooth, which had prior endodontic therapy and was retreated was not responding well. An image of the upper right temporary bridge spanning from the upper right first molar to the upper right canine is on the right.
It was decided that the upper right first molar should be extracted because its longevity of service was questioned; replacing the tooth with implants was risky due to health concerns.
Step 3
After a discussion with the patient about all available restorative options, a decision was made to restore the front teeth with a fixed bridge that also corrected her overlapping teeth and have it serve as a support for a removable prosthesis that would replace teeth in the upper posterior segment bilaterally. For esthetic reasons the fixed bridge has a "ball" attachment incorporated into it which fits into a complementary section of the maxillary removeable prosthesis. Thus no clasp shows on the right side and the clasp on the left is further back and is not seen when the patient smiles. An image of the completed case is on the right.
If you would like to discuss this case or any other please feel free to contact me
at eastboyntondental.com. You can also call the office at (561)-734-8600.
